Peter Elsea
elsea@cats.ucsc.edu
Electronic Music Studios
University of California, Santa Cruz
AbstractIn teaching modern music technology, I have met with a problem of presenting information from small readouts or computer screens. In this article, I describe two approaches: the use of close-up video cameras, and software packages that magnify details of computer screens.
In the Electronic Music Studios at the University of California, Santa Cruz (UCSC), we have a classroom dedicated to teaching modern music technology. This classroom includes a variety of composition, synthesis, and programming software. Demonstrating software so that students can see the computer monitor in detail would require either a monitor per every four or five students or a large scale projection system. Such equipment is difficult to accommodate in a studio already crammed with music and recording gear.
Two major problems emerge: one concerns camera use, the other concerns software.
Problem: Vision in the Classroom
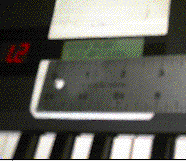
Electronic music is difficult to teach in a classroom situation because many of the instruments have a visual interface that is 3/4 of an inch high. Often this display is a liquid crystal that is visible only from a narrow range of angles. When demonstrating such a device to more than one or two students, a teacher must copy all of the displays on a board, prepare a multi-page handout, or simply wave his hands and talk a lot.

Figure 1. The problem is to present the information in the green window to 25 students.
Our Solution
Since 1991, the Electronic Music Studios of the University of California, Santa Cruz, have featured a closed circuit video system that allows the effective presentation of these instruments and similar small scale activities to classes as large as 25 students. Various types and configurations of equipment have been tested. The current setup consists of two large monitors (one is a multisync model with both video and computer inputs), a small camera, a pair of VCRs, and a switch box. The monitors are placed at the front of the room between large speakers, and elevated to a height of 6'. The space below the 6' line is filled with electronic music equipment.
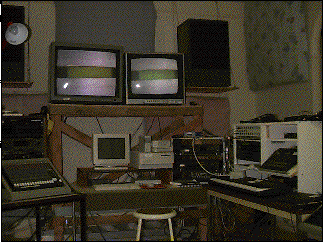
Figure 2. What the students see. There are only two lines of text in the display (unfortunately not clear in this low resolution picture), so the information is legible from the back row.
The System in Action
To use the system, the teacher simply turns on the equipment, places the camera so the instrument of the day fills the screen, and demonstrates it normally. Generally, the same image is on both video monitors, even though the screens are adjacent, which helps visibility. Occasionally, one monitor is switched to show the computer display with a real time spectral analysis program running, while the camera image on the other monitor shows the controls on the device being taught. The students can then see as well as hear the effects of the controls.
In another common scenario, the camera and instructor are in an adjacent control room, teaching the use of recording equipment. The teacher is visible through a window, the audio system allows teacher and students to hear each other, and the video system shows the class exactly what the teacher is doing.
Lighting. Since monitors are used instead of a projection system, the room lights can be left on and no special lighting is required for the cameras. Cardboard baffles have been hung from the ceiling to keep glare from the fluorescent lights off of the monitors. An occasional problem with the automatic contrast controls can be cured by placing a white paper frame around the display window of the instrument.
Cameras. There are now several types of miniature cameras that are effective in this use. The simplest, the FlexCam(TM) by VideoLabs Inc., has a tiny camera element on a gooseneck connected to a lightweight base. It is easy to get the camera into any position; the base is light enough to be placed on another piece of equipment; the neck is very flexible and stays where it is put; and the lens will focus down to an inch or so. Disadvantages are: (a) because a slight nudge will move it, the camera must be focused manually; (b) the instructor must often be looking over his or her shoulder to check the image in the classroom monitor; and (c) the gooseneck is a bit awkward to adjust.
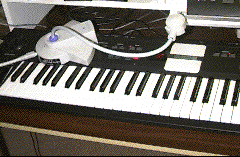
Figure 3. A FlexCam in use.
Another camera option is the Sharp Viewcam, an 8mm camcorder with a 4 or 5 inch LCD video panel on the back, which features a zoom lens and automatic focus--essentially a miniature monitor with a camera attached. The Viewcam image is better when displaying an entire device (the FlexCam tends to "fisheye" on wide shots), and camera manipulation is smoother. Typically, this camera is set up about 30 inches from the device to give an overview, and zoomed in for close ups. (A microphone stand with an adapter was found to be more convenient for mounting than the traditional tripod.) The disadvantages are expense (about 4 times the cost of the FlexCam), and the Viewcam's habit of shutting off every 10 minutes unless it is recording.
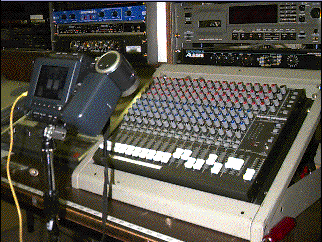
Figure 4. The Viewcam
Evaluation of the System
Comments from students indicate that the classroom video system is effective for presentation of details of operation of electronic music equipment. This success is borne out by students' scores on tests and success in performing the tasks demonstrated. When the system is in use, demonstrations are faster and the students have fewer questions than when the same material is covered by other means. Overall, the system has enabled a modest increase in class size and a significant increase in the amount of material covered over a year.
Another Problem
As previously mentioned, demonstrating software in the classroom of the Electronic Music Studios at the University of California, Santa Cruz (UCSC) so that students can see the computer monitor in detail would require either a monitor per every four or five students or a large scale projection system. Such equipment is difficult to accommodate in a studio already crammed with music and recording gear.
One Solution
The UCSC electronic music classroom features a 33-inch monitor that can be set to echo the display on the studio computer. The monitor is mounted at the front of the classroom, above the instructor's head, and above and behind the computer. Although details of the screen display are not very visible to the class of 20 or so students, a portion of the screen can be magnified, allowing the teacher to discuss and demonstrate specifics on screen controls, to highlight specific lines of code, and to display music as it is being played.
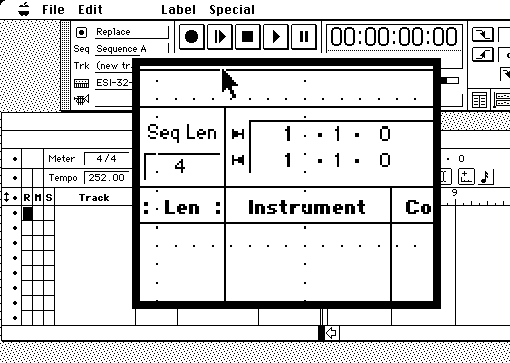
Figure 5. Screen with partial enlargement.
The software. The software that makes this possible is inLarge, a Macintosh system extension from ALVA Access Group Inc. 1400 Shattuck Ave. Berkeley CA 94709. (MAGic by Microsystem Software is a similar system for Windows computers.) All Macs come with a simple version of inLarge called CloseView. The two are very similar, but inLarge has certain features that make it worth the added expense.
A teaching scenario. In a typical session, the teacher will boot up the Mac and start with a discussion of the program's general function. Launching the application, the teacher will briefly magnify the program icon 4X so students can identify it and then return to normal view to discuss the overall layout of the screen.
Switching to 2X magnification, the teacher will demonstrate basic tasks, changing magnification to fill the screen, while discussing small controls, dialogs, or menu items. (In the large sizes, the screen display scrolls to follow the cursor, which helps when students ask to see a close up.)
Control. All operations are controlled by hot keys, which the teacher may redefine to avoid key combinations used by the program under discussion. Hot key functions include adjusting magnification, adjusting the size of the magnified region, setting operation mode, and switching magnification on and off.
The magnified area follows the cursor. With inLarge, there are two modes of movement. The magnified section may move with the cursor, keeping the cursor centered, or the section may move only when the cursor approaches the edge of the magnified area. Students greatly prefer the latter, as a constantly shifting screen is disconcerting. (This is the main reason to purchase inLarge rather than using CloseView, which has only the centered cursor mode.)
Effectiveness. Students and instructors find the system highly effective in teaching use of computer software. An example of improved delivery: In the traditional method of teaching music theory, the teacher writes chords on a whiteboard and then plays them on a piano. In this system, the teacher can run a notation program with the screen enlarged and play an electronic keyboard connected to the computer. The chords appear on the screen as they are played.
Summary and Conclusions
As technology continues to miniaturize the tools of electronic music, the difficulty of teaching the use of these tools to even small classes grows. Luckily, technology is also providing tools to overcome this difficulty. Economical compact video cameras allow students to collectively look over the teacher's shoulder, and computer screen magnification utilities allow the teacher to focus attention on small details in cluttered applications. Use of these techniques facilitates the usually contradictory benefits of increased class size and enhanced learning experience.
